【从前端开始学AI】DAY2:Markdown解析
前言
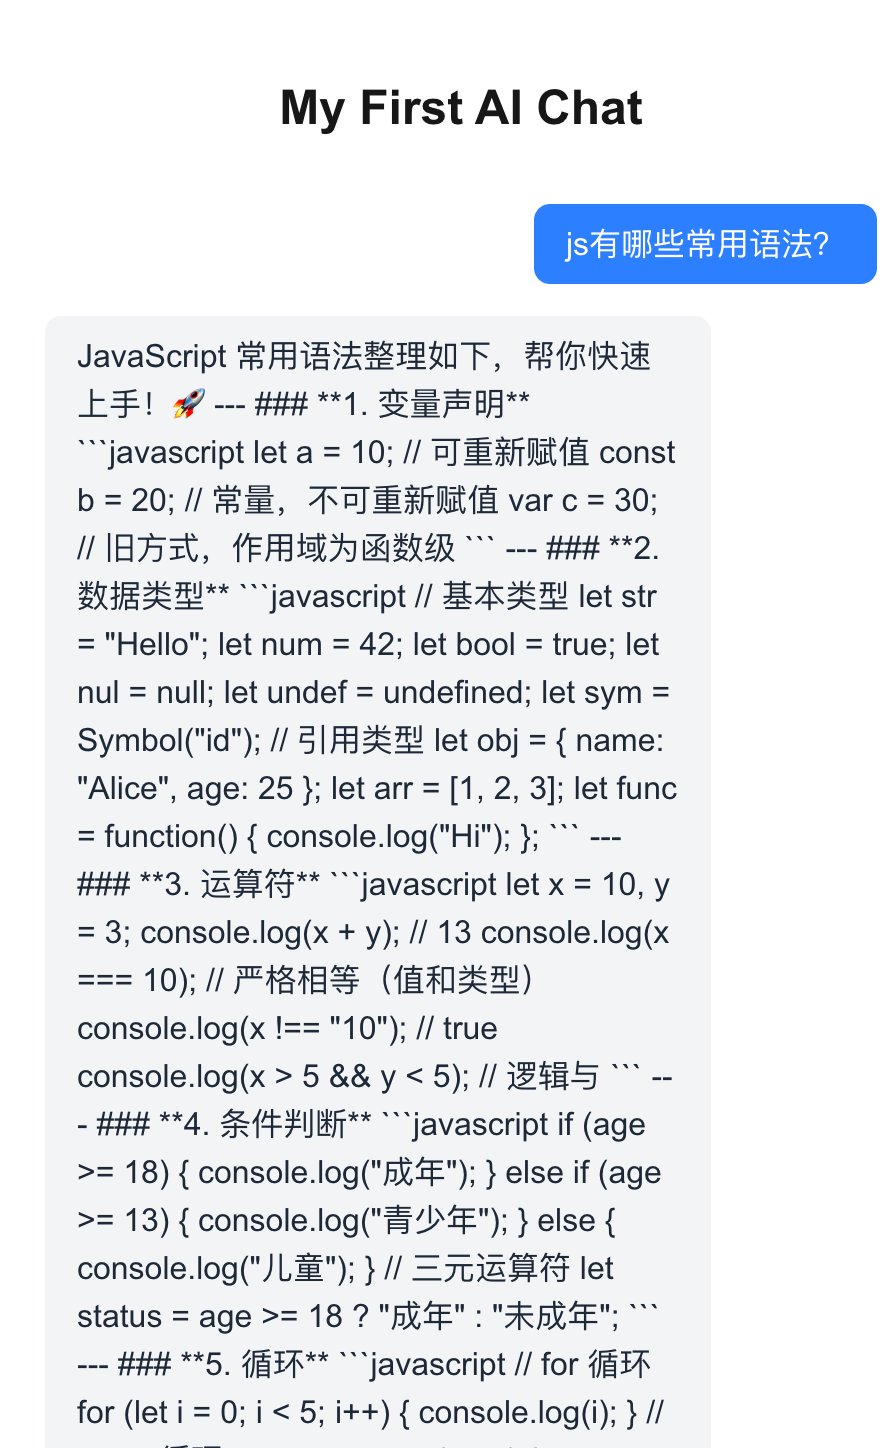
昨天我们实现了一个简单的 AI 应用,但是请你看一下下面这张图片

你会发现目前在前端展示的是一段纯文本,完全没有实现Markdown的渲染,看起来是在是太难看了。
那么我们今天要做的其实就是给我们的这个AI应用换上一套体面的衣服。
开工
安装依赖
1
2
3
| npm install react-markdown remark-gfm react-syntax-highlighter @tailwindcss/typography rehype-sanitize
npm install -D @types/react-syntax-highlighter
|
我们安装了四个核心库和插件:
react-markdown: 把 AI 返回的 Markdown 字符串转成 HTML。remark-gfm: 支持更高级的 Markdown 语法(比如表格、删除线)。react-syntax-highlighter: 给代码块上色。rehype-sanitize: 防止XSS攻击@tailwindcss/typography: Tailwind 的官方插件,自动帮我们给 HTML 标签(h1, p, ul)加上漂亮的默认样式,否则 Tailwind 会把所有样式都重置掉。
代码修改
配置插件
如果你是跟我使用同样的方法创建的这个应用,那么这个时候你大概率是使用的v4版本的tailwind,没有tailwind.config.ts,并且可以在app/globals.css下面看到有一行@import "tailwindcss";那么你就可以按照我这个方法去配置插件
打开 app/globals.css,在第一行 @import "tailwindcss"; 的下面,加上一行 @plugin 代码。
1
2
3
| @import "tailwindcss";
/* 👇 新增这一行 */
@plugin "@tailwindcss/typography";
|
创建MarkdownRenderer组件
创建app/components/MarkdownRenderer.tsx
1
2
3
4
5
6
7
8
9
10
11
12
13
14
15
16
17
18
19
20
21
22
23
24
25
26
27
28
29
30
31
32
33
34
35
36
37
38
39
40
41
42
43
44
45
46
47
48
49
50
51
52
53
54
55
56
57
58
59
60
61
62
63
64
65
66
|
import ReactMarkdown from 'react-markdown';
import remarkGfm from 'remark-gfm';
import rehypeSanitize from 'rehype-sanitize';
import { Prism as SyntaxHighlighter } from 'react-syntax-highlighter';
import { atomDark } from 'react-syntax-highlighter/dist/esm/styles/prism';
import { ComponentPropsWithoutRef } from 'react';
interface MarkdownRendererProps {
content: string;
}
type CodeProps = ComponentPropsWithoutRef<'code'> & {
inline?: boolean;
};
export function MarkdownRenderer({ content }: MarkdownRendererProps) {
return (
<div className="prose prose-sm dark:prose-invert max-w-none">
<ReactMarkdown
// 1. remarkPlugins: 处理 Markdown 语法 (如表格)
remarkPlugins={[remarkGfm]}
// 2. rehypePlugins: 处理 HTML 安全 (防 XSS)
// 注意:rehypeSanitize 默认非常严格,可能会过滤掉一些样式。
// 如果发现样式丢失,需要查阅文档自定义 schema,但在 AI 聊天场景通常默认配置足够。
rehypePlugins={[rehypeSanitize]}
components={{
code({ inline, className, children, ...props }: CodeProps) {
// 🛡️ 鲁棒性修复:确保 className 存在且为字符串
const match = /language-(\w+)/.exec(className || '');
// 逻辑说明:
// 1. !inline: 不是行内代码 (即代码块)
// 2. match: 成功匹配到了语言类型 (如 language-js)
const isCodeBlock = !inline && match;
if (isCodeBlock) {
return (
<SyntaxHighlighter
style={atomDark as any}
language={match![1]} // 这里加 ! 是安全的,因为前面已判断 match 存在
PreTag="div"
{...props}
>
{String(children).replace(/\n$/, '')}
</SyntaxHighlighter>
);
}
// 🍂 Fallback: 如果是行内代码,或者没匹配到语言,
// 则渲染为普通的 <code> 标签,保留 className 以便应用默认样式
return (
<code className={className} {...props}>
{children}
</code>
);
},
}}
>
{content}
</ReactMarkdown>
</div>
);
}
|
这个时候你可能会看到这样的报错,这个时候我们不要慌,这个并不影响我们程序的正常运行。
那么这个到底是怎么个情况呢?
其实是react-syntax-highlighter 这个库的类型定义(Type Definition)写得有点死板,它要求 style 属性必须是一个特定结构的索引签名对象。但是,导入的 atomDark 主题对象,虽然结构是对的,但在 TypeScript 眼里,它的类型推断稍微有点偏差(缺少了那个 [key: string] 的签名)。
但是atomDark 是从官方库里直接 import 出来的,它一定是符合格式的主题对象。所以我们不用太担心。
修改page.tsx
我们这边其实最重要的修改是根据messages中m的role来选择是直接展示文本还是使用MarkdownRenderer组件来渲染,用户的文本一般来说当作纯文本就好。还有一些别的美化,可以整个文件直接cv过去。
1
2
3
4
5
6
7
8
9
10
11
12
13
14
15
16
17
18
19
20
21
22
23
24
25
26
27
28
29
30
31
32
33
34
35
36
37
38
39
40
41
42
43
44
45
46
47
48
49
50
51
52
53
54
55
56
57
58
59
60
61
62
63
64
65
66
67
68
69
| "use client";
import { useChat } from "@ai-sdk/react";
import { MarkdownRenderer } from "./components/MarkdownRenderer";
export default function Chat() {
const { messages, input, handleInputChange, handleSubmit, status } =
useChat();
return (
<div className="flex flex-col w-full h-screen max-w-3xl mx-auto bg-background">
{/* 聊天记录区域 */}
<div className="flex-1 overflow-y-auto p-4 space-y-4 pb-32">
{messages.map((m) => (
<div
key={m.id}
className={`flex w-full ${
m.role === "user" ? "justify-end" : "justify-start"
}`}
>
<div
className={`max-w-[85%] rounded-2xl px-4 py-3 shadow-sm ${
m.role === "user"
? "bg-blue-600 text-white" // 👤 用户:蓝底白字
: "bg-gray-100 dark:bg-gray-800 text-gray-900 dark:text-gray-100" // 🤖 AI:灰底黑字
}`}
>
{m.role === "user" ? (
// 用户消息通常只是纯文本,直接渲染看起来更干净
<div className="whitespace-pre-wrap">{m.content}</div>
) : (
// AI 消息才需要 Markdown 渲染 (代码高亮、表格等)
<MarkdownRenderer content={m.content} />
)}
</div>
</div>
))}
{/* Loading 状态提示 (可选) */}
{status === "submitted" && (
<div className="flex justify-start">
<div className="bg-gray-100 dark:bg-gray-800 rounded-2xl px-4 py-3 text-gray-500 text-sm">
思考中...
</div>
</div>
)}
</div>
{/* 底部输入框区域 */}
<div className="fixed bottom-0 left-0 right-0 p-4 bg-white/80 dark:bg-black/80 backdrop-blur-md border-t border-gray-200 dark:border-gray-800">
<form onSubmit={handleSubmit} className="max-w-3xl mx-auto flex gap-2">
<input
className="flex-1 p-3 rounded-xl border border-gray-300 dark:border-gray-700 bg-white dark:bg-gray-900 focus:outline-none focus:ring-2 focus:ring-blue-500"
value={input}
onChange={handleInputChange}
placeholder="问点什么..."
/>
<button
type="submit"
className="bg-blue-600 text-white px-6 py-3 rounded-xl hover:bg-blue-700 transition-colors font-medium disabled:opacity-50"
disabled={status === "streaming" || !input}
>
发送
</button>
</form>
</div>
</div>
);
}
|
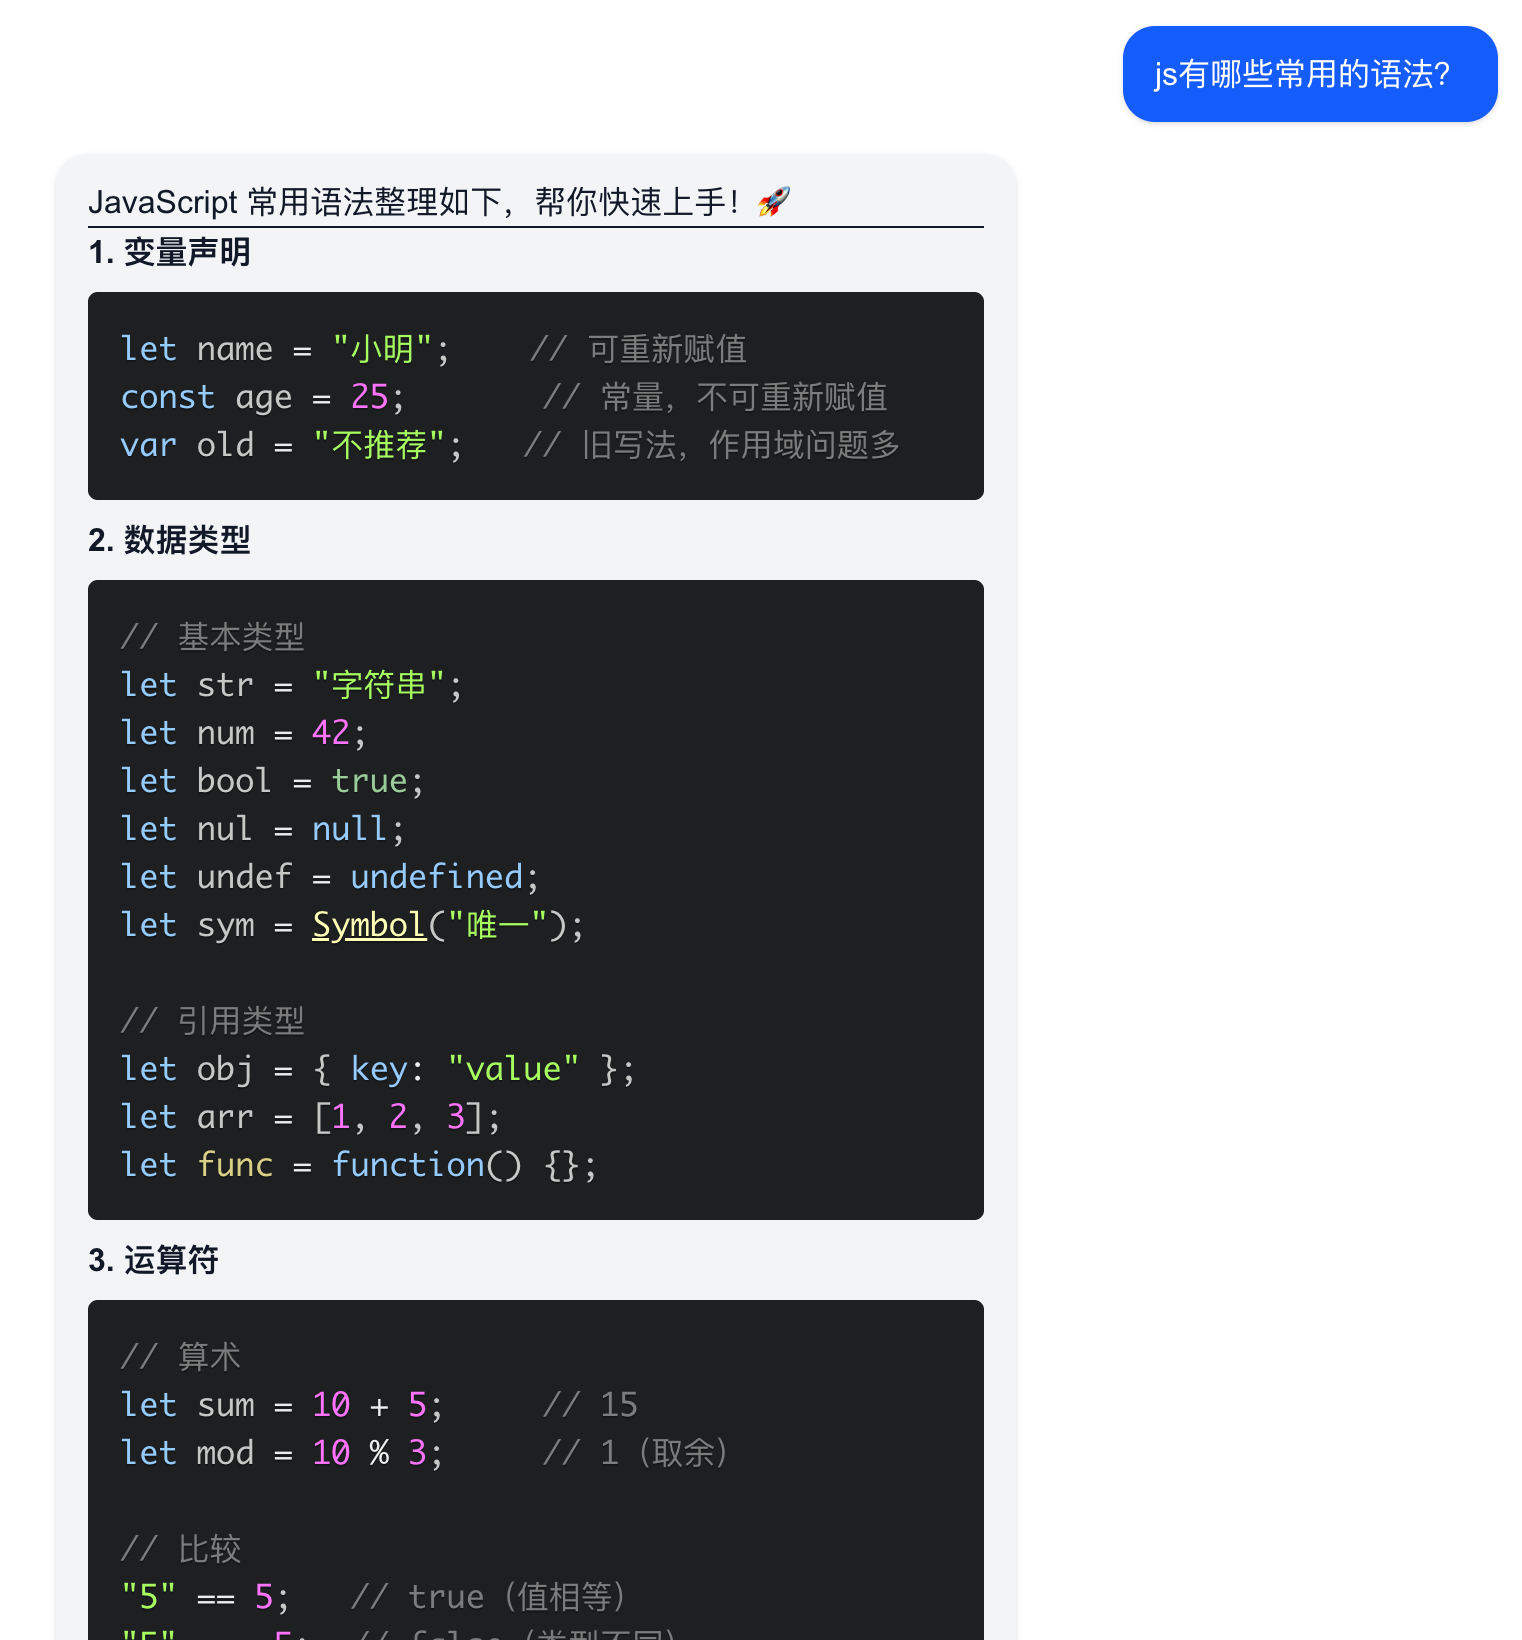
效果展示
让我们最后来看一下修改的效果吧
不错不错看起来已经像是一个正经的AI应用了。
“犯罪预告”
Day 2 我们解决了“面子”问题(Markdown 渲染与代码高亮),让 AI 的回复变得美观可读。
Day 3 我们将解决“里子”问题,让 AI 不仅能 “说”,还能 “做”。
我们将接触 AI 开发中最核心、最前沿的两个概念:Prompt Engineering(提示词工程) 与 Generative UI(生成式 UI)。
🚀 明天的学习目标
1. 给 AI 注入人设 (System Prompt)
我们将不再使用默认的 AI 设定,而是通过 System Prompt 在后端给它植入一个“严谨金融分析师”的大脑。你会发现,有了人设的 AI,回复的语气和逻辑将完全不同。
2. 突破文本限制 (Generative UI)
这是明天的重头戏。当用户询问“比特币价格”时,我们不要 AI 只是枯燥地打字回复。
我们要让 AI 自动触发工具函数,并返回一个动态渲染的股票行情卡片组件。
- 技术点:Vercel AI SDK 的
tool 定义、zod 数据校验、前端组件映射。
🛠️ 课前准备
明天我们需要用到一个极其重要的库来定义数据结构,请大家提前安装:
Zod 是 TypeScript 生态中最流行的 schema 声明库,明天它将作为 AI 与前端组件之间的“翻译官”。
一句话总结明天:
我们将把一个“只会聊天的 ChatBot”,升级为一个“能看懂指令、能渲染组件的超级助手”。
明天见! 👋